Eva Marina Homeschools
Showing posts with label art. Show all posts

Monday, April 1, 2013

Milwaukee Art Museum | ArtPacks

We are very lucky to live so close to a wonderful art museum with an exceptional children's program.  We visit quite often, Ignacio loves it.  This will be the first in a series of posts dedicated to the MAM.  The museum offers ArtPacks that you can borrow free of charge while during your visit.  Each pack includes a self-guided (hands-on) project to be completed in the galleries.  Each pack is unique and inspired by a specific art work found in the museum.  These are just a few that we've completed.

On this day we were joined by Mia and another friend of theirs.  The first pack they tried corresponded with Red, Yellow, Blue II by Ellsworth Kelly.  It consisted of three large stretchy tubes of fabric to make their own performance art.


They then worked on the pack available for The King's Jester by Joán Miró.  They were able to make a collage version of the jester as well as draw a smaller version to keep for themselves.


The girls went home after lunch, but we decided to stay a little longer.  Ignacio was able to try their King for the Day costume by borrowing the General Monk Receiving King Charles II on the Beaches of Dover by Benjamin West pack.  He had a blast and said it was his favorite part of the day.  How awesome is this?


I thought I'd try something different with the pictures, I like it.  I really want to get in the habit of blogging regularly again and thought I'd have a little fun.  I'll be back soon.


Friday, January 11, 2013

New Year – New Posts


I’m back from my longer than planned hiatus.  I just needed time to focus on other things.  I have many plans though, so stay tuned.

Since a post is not a post without a picture, here is a solar system Ignacio drew as a gift to our doctor.  He ran out of space and I had to tape more paper to extend it.  Yes, he did include Pluto.  He knows it is a dwarf planet, that doesn't stop him from showing his love.  (Oil pastels on construction paper)  


See you soon!

Sunday, May 20, 2012

2012 Science Fair / Art Show

Our homeschooling group hosts a Science Fair/Art Show on the last meeting of the school year.  This was the first year that we attended.  Ignacio initially wanted his entire project on Betelgeuse, his favorite star.  Honestly, I couldn’t think of what we could do as the actual project so I suggested we broaden it to include all stars.

  1. He came up with this awesome title all by himself!  The middle panel had random star facts and a size chart to compare multiple stars to planets in our solar system.  We also made an outer space word search puzzle and brought in books to show what Orion and the Orion Nebula really look like.
  2. Our actual experiment was very simple.  We shaped a half circle out of clay and stuck a paperclip in it.  Then we stuck star stickers onto a clear glass bowl.  The clay represents the Earth and the paperclip represents the child.  You hold the glass bowl slightly above the base and slowly turn the cardboard.  Make sure to point out where the different stars are in relation to the paperclip.  This is a simple way to demonstrate that stars do not move.  Stars only appear to move because the Earth spins on its axis.  I found this project in Janice VanCleave's Solar System book.
  3. Orion, Ignacio’s favorite constellation.  The red star represents Betelgeuse and the blue star represents Rigel.
  4. We needed another constellation to keep things balanced, he chose the Big Dipper.
  5. Ignacio and his best friend Mia.
  6. For the art show, Mia made this adorable bean mosaic.
  7. Rigel, Ignacio’s second favorite star.
  8. Betelgeuse, Ignacio’s favorite star.
  9. The science fair ended with a session of creative movement led by two of the moms.  They acted out everything from bears to tornadoes.  At the end they were told to act like their science project.  This is Ignacio’s version of Orion.
For the art show, we chose to share his Earth Day and Rainbow collages.

Here is a detailed view of Mia’s mosaic.  Isn’t it beautiful?!


Wednesday, April 25, 2012

Earth Day | Follow-Up 1

We love to craft.  So, when I saw this project shared by A Mommy’s Adventures I knew I wanted to try something similar.  She in turn got the idea from Itsy Bitsy Learners.  Isn’t the internet wonderful?  Be inspired! 


Our version was done using watercolors, oil pastels, and construction paper. 


Ignacio loves geography.  We have many maps and globes.  I found this tiny globe in the Dollar bin at Target.  It comes in very handy, especially when we don’t have much room left on the table.  Ignacio wanted to draw the outlines for North and South America.  He was afraid that if he didn’t, they wouldn’t be recognizable.  He had to decide where to start.


He did a really good job.  He drew it all himself.  He only asked for help in deciding how wide to draw South America.  (I should mention that we used a thick watercolor paper.  I traced a Frisbee and cut out the circle for him.)


He then colored it all in by layering two shades of green oil pastels.


I love Prang watercolors, you can’t beat their vibrant colors.  Ignacio chose to mix blue and turquoise blue for his water.  In all honesty, I was too lazy to go upstairs and look for our good brushes.  We used the brush included in the set and as you can see, we had quite a few loose fibers left behind.  No worries, they come right off once it dries.


I brought out some of our multi-cultural construction paper and Ignacio chose the paper he thought best matched him.  It is hard to tell from these pictures, but he did choose the best match.


For obvious reasons I traced his hands for him.  Using a 9x12” sheet of construction paper I had him place one forearm on each corner then position his hands towards the middle, almost touching each other.  He cut them out himself, only asking for help cutting where the fingers meet.


I cut out a heart to use as a template.  He then traced it onto red construction paper and cut his heart out.  I like using heavy bond double sided tape, rather than glue.  It forms a strong and immediate bond.  I especially like that the edges do not lay perfectly flat.  I love the texture and dimension.  We matched the corners in his arm cutouts to the corners in his background paper, perfect fit.  He loved this project!


A few close-ups:


Next post I’ll share a few resources we’ve been using this week to learn more about our Earth.

Sunday, April 1, 2012

stART | What Makes a Rainbow?

Although Ignacio is now reading, I make it a point to still read at least one book a day to him.  He usually jumps in and we end up reading the book together.  We moved while I was recovering from surgery and I have yet to finish unpacking.  I like to bring a few books out at a time as a surprise.  I took advantage of Francisco’s nap and brought out “What Makes a Rainbow” by Betty Ann Schwartz. 


We read this book when he was younger, but he didn’t remember it.  When he first saw it he complained that I had brought out a “baby book”.  That all changed once we opened it and began reading.  He loved the way the ribbons formed a rainbow.


I love the colors used in the illustrations.


As Ignacio would say, “The happy ending”.


Ignacio has been very interested in collages lately.  When I saw a blow post showing how to make a rainbow collage I knew we had to try it.  I have some rolls of kraft paper that measure 13.5x30”, I began by taping one to the floor.  I purchased back issues of National Geographic magazine at a thrift store and piled them next to the paper.  Once I was ready, I showed Ignacio the blog post over at Art Projects for Kids using my NOOKcolor.


This project was a joint effort.  I cut out some of the more elaborate shapes, but he had a great time finding pictures we could use.


We began by simply placing the pictures into groups.  I’m glad I decided to wait until the end to glue them down.  It was like building a jigsaw puzzle.  It was interesting to see how the perception of color changes with its surroundings.  We thought we had too much orange, but once we started putting it together we realized it was actually the opposite.  Some of the orange pictures were really more of a red, others yellow.  We ended up having to go back and find more true orange.  Ignacio’s favorite color is green, of course we had more than enough of that color.


By the time we finished cutting everything, he needed a break and asked me to glue it all myself.  Once I was done I covered the entire collage with contact paper.  It was surprisingly easy.  There were a few air bubbles, but I find that in this case it actually adds to the appeal.  Here is the finished collage.


A closer look:


We really had a great time.  Ignacio wants to make another collage.  It was a very affordable project.  The roll of paper cost me .50 and the magazines were .20 each.  I should point out that I did finish an entire glue stick, glad I always have a few on hand.  What a great afternoon!

On a side note, while at the library the following day I came across “Ruby, Violet, Lime: Looking for Color” by Jane Brocket.  While it is more of a concept book than a story book, I think it is also a great choice for this project.

Make sure to check out more stART projects at A Mommy’s Adventures.

Saturday, September 11, 2010

Dangly Monkeys

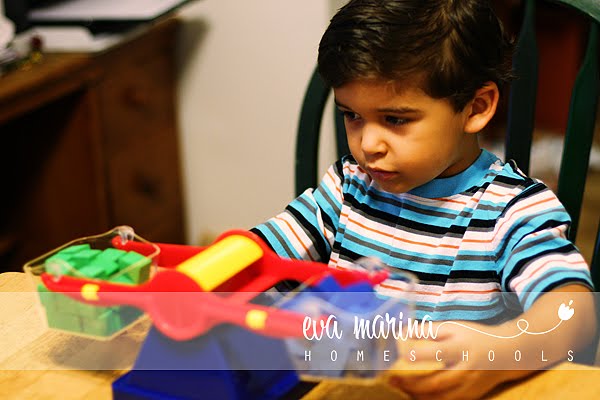
One of Ignacio's favorite math manipulatives is his balancing scale.  He likes to make one side very heavy, then balance it with the other side.  Sometimes he uses his foam pattern blocks, other times he throws in random toys.


We've read a few MathStart books on the subject.  I thought it would be easier for him to begin learning weights if he first got a good grasp on heavy and light.  I recently ordered a copy of The Usborne Big Book of Science Things to Make and Do


Its been on my wishlist for a while, I finally decided to buy it.  I'm glad I did!  I love Usborne books and this one did not disappoint.  There are many little projects that we will be trying.  When I saw their Dangly Monkeys project I got to work.  It was perfect timing.


One thing to note about this book is that while it includes instructions and pictures, it does not include patterns.  I drew and cut out my own monkeys.  We used markers to color them in.  We only colored one side, but I think I might have him color the backs also.  He colored two of them and asked me to help so... I colored four.  Not originally my intention, but we had plans later that afternoon.


Can't forget the details!


Beautiful!


I made the branch using pipe cleaners. I hung the branch by tying a piece of yarn to it and taping the other end to the top of a doorway. 


I was hoping he would be able to balance the monkeys all by himself, but he needed my help.  This was really my fault for two reasons.  First, I don't think I gave the monkeys' arms and tails enough of a "hook".  Second, the book instructed you to tape the hanging branch to the end of a table.  I am seven months pregnant and decided I would rather work standing up.  Well, in order to attach the branch to the doorway the yarn had to be like three feet long.  This made the branch very sensitive to balance, as it swayed very easily.  The monkeys did balance though. 


Ignacio loved it.  I love how something that was so fun for him is also so educational.  There were bits of math and science... all topped off with some art!  We love getting crafty.  ;)


After that we were off to enjoy a fun afternoon in the park with new friends.